Tutorial: Anchor AR Content to a Face in RealityKit
Add Augmented Reality Content to a User’s Face using RealityKit
A common use of Augmented Reality content is to overlay 2D or 3D objects on top of a user’s face. Let’s talk about how to do this in a RealityKit project.
Let’s start with the Augmented Reality App template in Xcode:

For this project, we will be using SwiftUI for the Interface, Swift for the Language, and RealityKit for the Content Technology:

The basic project should look something like this:

Now we’re ready to build our app.
Using the Experience.rcproject File
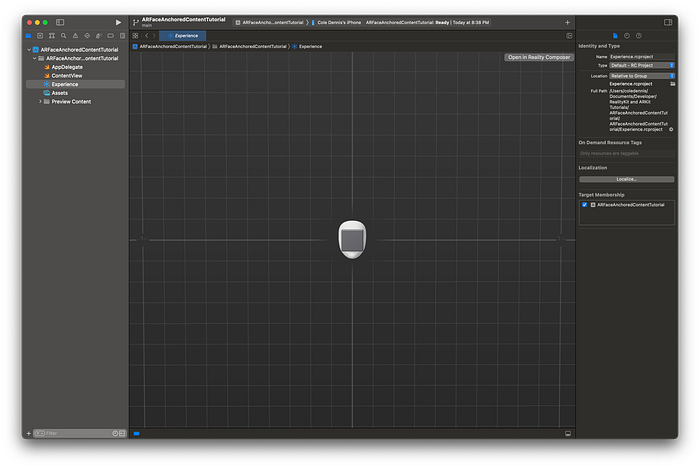
The Augmented Reality template comes with a Reality Composer file built in, the Experience.rcproject file:

By clicking on the “Open in Reality Composer” button in the top right corner, we can open this file in the Reality Composer app:

What is Reality Composer?
The Reality Composer app is packaged with Xcode on Mac and is available on iOS and iPadOS from the App Store. Designed by Apple, this is one of the easiest ways to quickly create AR content to be integrated into an app.
Changing the Reality Composer Scene to be Face Anchored
You’ll notice in the top right corner a section titled “Anchor”:

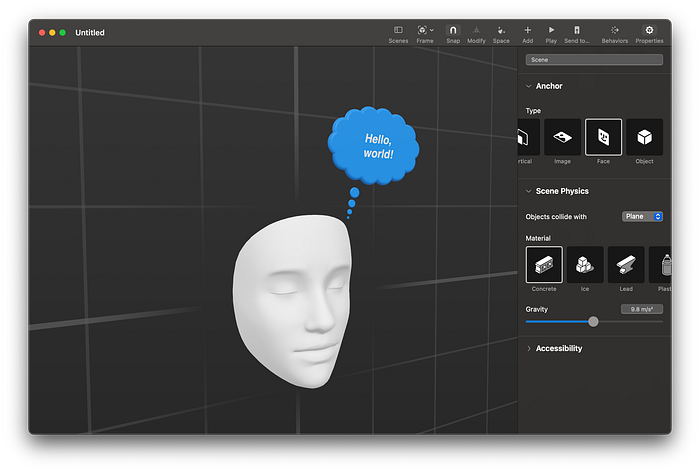
This section allows you to select from different anchoring options. The default is “Horizontal”, but for the purposes of this tutorial, we will select “Face”:

You should now see a white face-shaped object appear at the center of our grid. You can use this as a reference for where AR content will be anchored in relation to a user’s face. For now, I’ll keep the cube where it is, but you can move it around and modify this scene however you like.
You’ll notice that our Xcode project also updated automatically to reflect the new changes we made in Reality Composer:
However, if you run the project on a device, you’ll see that the content is not yet being anchored to faces. This is because we need to run the ARFaceTrackingConfiguration on the ARView.Session.
Add this to the ARViewContainer:
import ARKitarView.session.run(ARFaceTrackingConfiguration())
Your ContentView should now look like this:
If you run the project now on your device, you should see that the Reality Composer scene is anchored to the user’s face!

Using a New Reality Composer File
What if we wanted to make a new Reality Composer project outside of Xcode, and then add that to our project? Luckily, this is quite easy to do!
To get started on Mac, open up the standalone Reality Composer app:
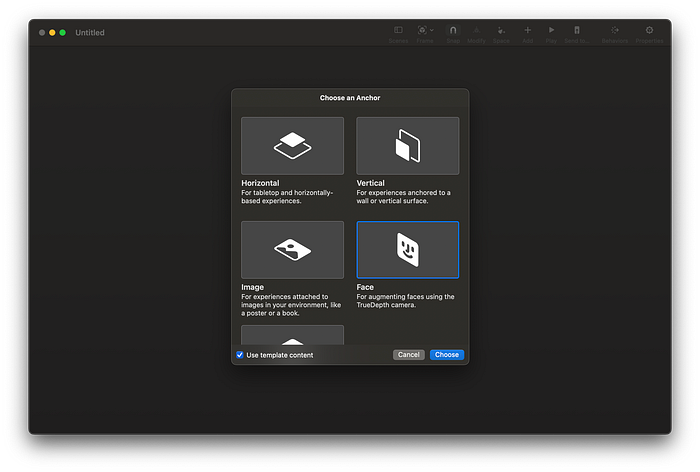
On the “Choose an Anchor” screen, select the “Face” option:
Your app should look like this:
If you wanted to, you could add any number of tweaks to this RealityComposer file, but for the purposes of this tutorial I will keep this as it is.
To add this to our project, drag the file into the left side Navigator pane:
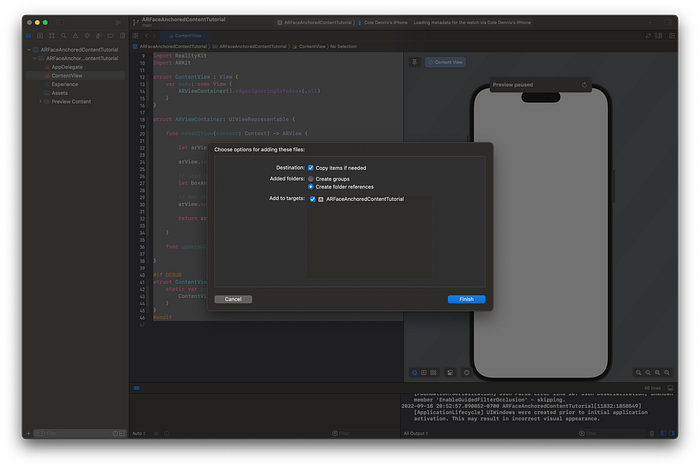
You should now see the new RCProject file in the project:

To add this to our scene, add the below code to the ARViewContainer struct:
// If you did not do this earlier in the tutorial, add this now
arView.session.run(ARFaceTrackingConfiguration())

// Load the "Scene" scene from the "AR Face Anchoring Tutorial" File
let faceAnchor = try! ARFaceAnchoringTutorial.loadScene()

//Add the face anchor to the scene
arView.scene.anchors.append(faceAnchor)
Your ContentView file should now look like this:
If you run the project now on your device, you should see that the Reality Composer scene is anchored to the user’s face!

Without Reality Composer
What if we wanted to anchor digital content to the user’s face without using a Reality Composer file?
Let’s create a sphere and anchor it to the user’s face, completely in Xcode!
Generating the Sphere
To create a sphere, we need to create a ModelEntity, which contains a mesh and materials. For the mesh, we can call the .generateSphere() function, and for the materials, we can add a SimpleMaterial() into the array.
This gives us code that looks like this:
let sphereEntity = ModelEntity(mesh: .generateSphere(radius: 0.1), materials: [SimpleMaterial(color: .white, isMetallic: false)])Anchoring to the Scene
Now we need to anchor this to the ARView.Scene. First we’ll create a new AnchorEntity anchored to the user’s face:
let sphereAnchor = AnchorEntity(.face)Next we’ll add the sphereEntity as a child to the sphereAnchor:
sphereAnchor.addChild(sphereEntity)Finally, we add the sphereAnchor to the ARView.Scene:
arView.scene.anchors.append(sphereAnchor)Your updated ContentView file should look like this:
If you run the project now on your device, you should see that the generated sphere is anchored to the user’s face!
You might notice that the very top and bottom of the sphere looks like it’s getting cut off. This is because ARKit automatically adds a mesh with an occlusion material to the user’s face. Luckily, there is a way to turn this off if desired! Just add the below line to your project:
arView.renderOptions = .disableFaceMeshThis will result in the below effect:

I hope this helps you get started on your way to creating face-based Augmented Reality experiences!
The full repository with the examples shared can be found here: