VisionOS Window Resizability Explained
Pick the right window sizing option for your VisionOS app
VisionOS, the operating system for the Apple Vision Pro headset, gives developers multiple options for controlling how users can interact with Windows. Here is a quick walkthrough with imagery of how each of the options behave:
Modifying WindowGroup
Window resizability behavior is adjusted by adding the .windowResizability(…) modifer on the WindowGroup. If you are using the VisionOS template code provided by Xcode, this can be found in the “App” file:
import SwiftUI

@main
struct WindowResizabilityDemoApp: App {

    var body: some Scene {
        WindowGroup {
            ContentView()
        }
    }
}
Automatic
This is the default window behavior, allowing users maximum flexibility for resizing their content.

As this behavior is the default, no modifiers are required to enable this behavior. Alternatively, this style could be explicitly requested with the .windowResizability(.automatic) modifier:
import SwiftUI

@main
struct WindowResizabilityDemoApp: App {

    var body: some Scene {
        WindowGroup {
            ContentView()
        }.windowResizability(.automatic)
    }
}
While this does give the user the most control over their experience, this can result in content getting cutoff by the edges of the window or being distorted that might not be desired by the app’s developers (as seen in the above GIF).
contentMinSize
This behavior allows for flexibility, while not allowing window to get smaller than the content of the View.

This style is declared by using the .windowResizability(.contentMinSize) modifier:
import SwiftUI

@main
struct WindowResizabilityDemoApp: App {

    var body: some Scene {
        WindowGroup {
            ContentView()
        }.windowResizability(.contentMinSize)
    }
}
While this does avoid some of the content cut-off issues, this does allow users to make the windows larger than might be appropriate given the actual content.
contentSize
The most restrictive behavior, contentSize limits the size of the window to be restricted to purely what the view contains (although I would also point out that text has a risk of being truncated still when made the user tries to resize the window to be smaller).

This style is declared by using the .windowResizability(.contentSize) modifier:
import SwiftUI

@main
struct WindowResizabilityDemoApp: App {

    var body: some Scene {
        WindowGroup {
            ContentView()
        }.windowResizability(.contentSize)
    }
}
contentSize with a Frame Range
A way to make the contentSize modifier more flexible is to combine it with a .frame(…) modifier on the view to give the view min and max dimensions that the developer is comfortable with the user experiencing.
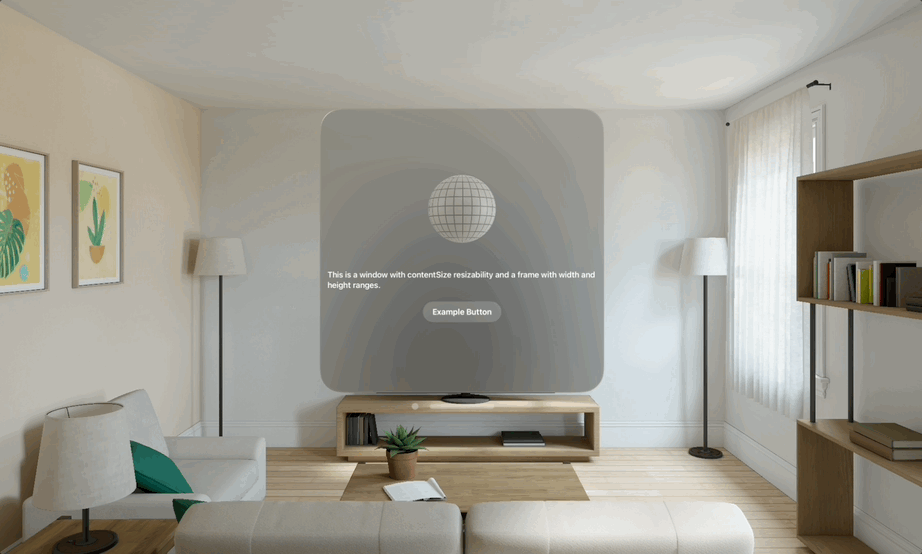
This would look like the below in code:
import SwiftUI

@main
struct WindowResizabilityDemoApp: App {

    var body: some Scene {
        WindowGroup {
            ContentView()
                .frame(
                    minWidth: 400, maxWidth: 600,
                    minHeight: 400, maxHeight: 600)
        }.windowResizability(.contentSize)
    }
}
Setting a default window size with .defaultSize(…)
In addition to the .windowResizability(…) modifier, users can set a starting size for windows using the .defaultSize(…) modifier to set the starting size for a window.
For example, this would be a window with a default width of 2000 and height of 800:

import SwiftUI

@main
struct WindowResizabilityDemoApp: App {

    var body: some Scene {
        WindowGroup {
            ContentView()
        }.defaultSize(width: 2000, height: 800)
    }
}
And this would be a window with the default width of 800 and height of 2000:

import SwiftUI

@main
struct WindowResizabilityDemoApp: App {

    var body: some Scene {
        WindowGroup {
            ContentView()
        }.defaultSize(width: 800, height: 2000)
    }
}